Saturday, August 30, 2008

Cake Toppers

Tomorrow is my Mother's 79th birthday and we are having a small surprise party for her. I am making the cake and created these cute "cake toppers" to decorate it. My DGD is going to be there (her great-granddaughter) so I decided to use "Mom", "Grandma", and "Great-Grandma" along with "Happy Birthday".


There are 6 different cricut cartridges used in the making of these!


"Mom" was cut from All Mixed up. A rose from Walk in my garden replaces the "O". I welded the shadows of the letters with the rose in Design Studio then cut the m's out of DP and the rose out of glitter white paper. I tied pink fiber on some of the letters to jazz it up.


"Grandma" and the balloons are from the Tear Drop cartridge. I welded the shadows of the letters and the balloons together in Design Studio then cut separate letters and balloons out of DP. The balloons were covered with Glossy Accents to give them some shine. I replaced the paper strings on the balloons with fibers. Fuzzy fibers were tied to a couple of letters to finish it off.


"Great Grandma" was cut using the Jasmine cartridge. I love how Jasmine looks but I have a very hard time getting it to cut without tearing. The heart is from Beyond Birthdays. Again I welded the shadows together in DS then cut the letters and heart pieces in DP. I made 2 small cuts in the center of the heart and tied tiny ribbon through the cuts. Fiber again on some of the letters for "Bling"

And finally the "Happy Birthday". This is pre-done on the ZooBallo cartridge. In Design Studio I welded the happy above the birthday and added the butterfly from Walk in my garden. Cut out all the letters and butterfly pieces in DP. I added rhinestones to the butterfly, and as the dot above the "i". More fiber to finish it off.


All the final pieces were mounted on b-b-que skewers that I cut down to size. I used double sided tape to hold the skewer to the back of the piece.

Wednesday, August 27, 2008

Max and His Tree

Card #2 made during my crop on Sunday...

I love this simple little stamp. It is "Max Tree" by Stampendous.

Max was stamped on white cardstock that I cut into an oval using a Nestability die. I also used the scallop Nestability die to cut the scalloped oval behind him.

I used Prismacolor pencils (my favorite coloring tool) and smoothed the color with gamsol. Max was mounted using pop-dots to give the card some depth.

The DS paper was purchased at Hobby Lobby, but I can't remember who makes it. I like the swirly leafy things. They remind me of swirling snow and windy winter days.

This was a simple card, but I love how it turned out.

Christmas Tree w/ inked embossing folder


I spent a terrific day on Sunday at a local crop. We talked so much that I only completed 2 Christmas cards. This one is done using the Cuddlebug Lace Tree embossing folder.

I inked the debossed side of the folder with Stampin' Up's Glorious Green ink. I find it is easier to do this using a brayer. After the ink is on the folder place your white cardstock in the folder and close it. Run it through your cuddlebug machine as you would normally do.

When you remove the cardstock the embossing folder can be cleaned very easily with a baby wipe or mild soap and water.

The ink will dry almost instantly on the cardstock so you can add embellishments right away. I put small dots of Crystal stickles on parts of the tree and small dots of Christmas Red stickles in the center of the 2 flowers on the tree.

Give this technique a try. It is super easy and the results are fantastic!

Saturday, August 23, 2008

Get Well Card

My Secret Sister's Mom has been having a rough time lately so I made this card for her. I love the House Mouse Stamps and this one is so cute.

The image is colored with Prismacolor pencils and smoothed out with Gamsol. Nestabilities were used to create both ovals. Matching buttons and "Fun Fur" accent the corners. The edges of all were inked with Colorbox Chocolate pigment ink. I have no idea who makes the DP. It was part of my stash. The brown CS is from the DCWV's Fall Stack. The Rose CS is from Archivers.


1st Christmas Card

I know it's August, but I wanted to start making Christmas Cards now. I know I take forever to get a single card finished so it was a good bet that if I started now I just might have enough finished to actually send out this year! LOL


This is a terrific Santa stamp from Stampin' Up. He is part of a 1998 Set called Christmas Is Here. I colored the image with Prismacolor pencils. There are Crystal Stickles on the front of his robe and the white part of his hat. Green Stickles for the dots on his robe.
I had a heck of a time cutting the corners. I used 1/2 of a small oval punch.
The border is hand doodled and crystal stickles were used as the dots.
I also used the Joys of the Season Cricut cartridge to cut out the snowflakes. Ran them through my Xyron upside down and covered them with glitter.
I don't recommend this paper at all. There is NO adhesive that wants to stick to it, and believe me, I tried everything. Even my trusty ATG did not want to adhere to this paper!

FYI: The card is 5 x 7, DP is Paper Company "Starburst Translucent"

Monday, August 18, 2008

Summer Fun - 1st time at the beach


This was my DGD's 1st time at the beach in June of 2008.


Title was cut using Tear Drop

Sun & Boat cut from Mickey & Friends

Clouds cut from Zooballoo

The flowers and "rocks" were a RAK from my Secret Sister

And the birds were from a chipboard set from ScrapinGracie

STUCK....


My son went to an Indy Car Race with a friend. They had pit passes and there were mini stock cars on display. They were allowed to try them out so he climbed into one to see what it was like. There was just 1 problem....HE COULDN'T GET OUT!!! Of course his friend didn't help get him out of the car. Instead he laughed and took his picture. A scrapbook moment!


Friendship Card

This card was my first attempt at machine stitching on a card. It is difficult to do because the cardstock tends to slip around.


The image is Sarah Kay that I colored with Prismacolor pencils then blended with mineral spirits.

The inside of the card was done on my computer by printing onto the cardstock before adhearing to the card.

Simple Anniversary Card

I love Black & White and decided to use these colors for an anniversary card.
The white cardstock was run through the Cuddlebug using the Birds & Swirls embossing folder.
I used diamond stickles on the birds to help them stand out.
The initials were welded in Design Studio and cut out using
Jasmine font and DP from the Scrapworks paper pack "Formal Affair"
A simple ribbon with a charm and prisma flowers were added to complete the card.

Finally catching up on my posts

I have been busy posting on the Cricut Message Board and realized that I could not keep up with posting here and posting there. I've decided to put my posts here and link back.
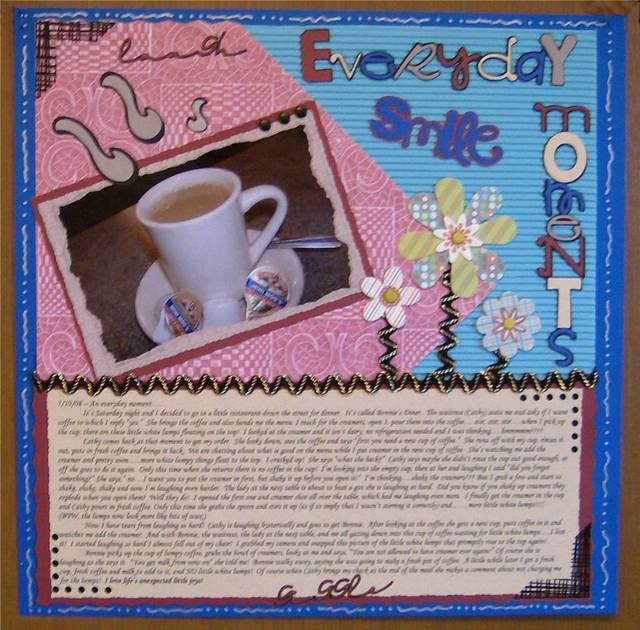
I did this fun and quirky scrapbook page to remember an "Everyday" moment. We often forget those simple, unplanned, funny things that happen to us on an ordinary day. I didn't want to forget this one.
I think I used almost every Cricut font cart I own to create the title.

This is what happened while having dinner at a local restaurant on a Saturday night. BTW the restaurant is called Bonnie’s Diner. The waitress (Cathy) seats me and asks if I want coffee to which I reply “yes.” She brings the coffee and also hands me the menu. I reach for the creamers, open 3, pour them into the coffee… stir, stir, stir….when I pick up the cup, there are these little white lumps floating on the top! I looked at the creamer and it isn’t dairy, no refrigeration needed and I was thinking… hmmmm???? Cathy comes back at that moment to get my order. She looks down, sees the coffee and says “first you need a new cup of coffee.” She runs off with my cup, rinses it out, puts in fresh coffee and brings it back. We are chatting about what is good on the menu while I put creamer in the new cup of coffee. She’s watching me add the creamer and pretty soon…..more white lumpy things float to the top. I cracked up! She says “what the heck?” Cathy says maybe she didn’t rinse the cup out good enough, so off she goes to do it again. Only this time when she returns there is no coffee in the cup! I’m looking into the empty cup, then at her and laughing I said “did you forget something?” She says,” no…I want you to put the creamer in first, but shake it up before you open it!” I’m thinking….shake the creamers??? But I grab a few and start to shake, shake, shake and now I’m laughing even harder. The lady at the next table is about to bust a gut she is laughing so hard. Did you know if you shake up creamers they explode when you open them? Well they do! I opened the first one and creamer shot all over the table, which had me laughing even more. I finally get the creamer in the cup and Cathy pours in fresh coffee. Only this time she grabs the spoon and stirs it up (as if to imply that I wasn’t stirring it correctly) and……more little white lumps!!!! (BTW, the lumps now look more like bits of wax.) Now I have tears from laughing so hard! Cathy is laughing hysterically and goes to get Bonnie. After looking at the coffee she gets a new cup, puts coffee in it and watches me add the creamer. And with Bonnie, the waitress, the lady at the next table, and me all gazing down into this cup of coffee waiting for little white lumps….I lost it! I started laughing so hard I almost fell out of my chair! I grabbed my camera and snapped this picture of the little white lumps that promptly rose to the top again! Bonnie picks up the cup of lumpy coffee, grabs the bowl of creamers, looks at me and says, “You are not allowed to have creamer ever again!” Of course she is laughing as she says it. “You get milk from now on” she told me! Bonnie walks away, saying she was going to make a fresh pot of coffee. A little while later I get a fresh cup, fresh coffee and milk to add to it, and NO little white lumps! Of course when Cathy brings my check at the end of the meal she makes a comment about not charging me for the lumps! I love life’s unexpected little joys!
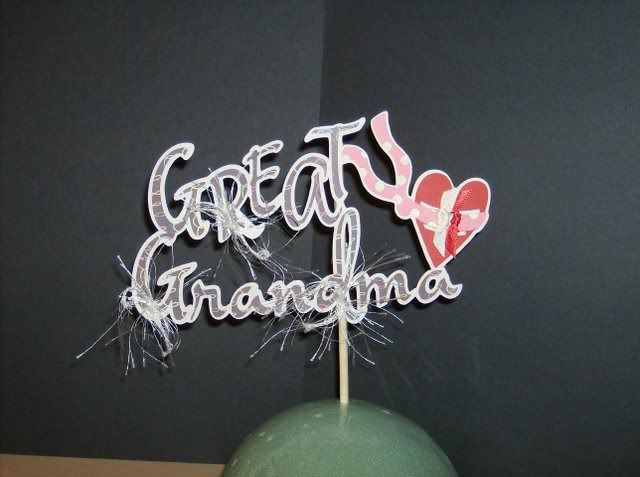
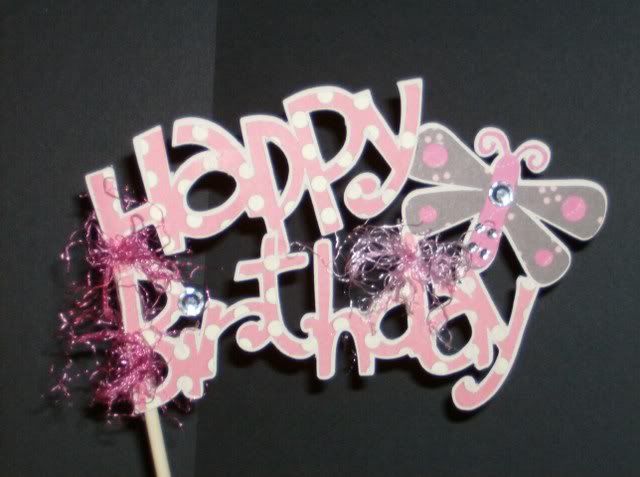
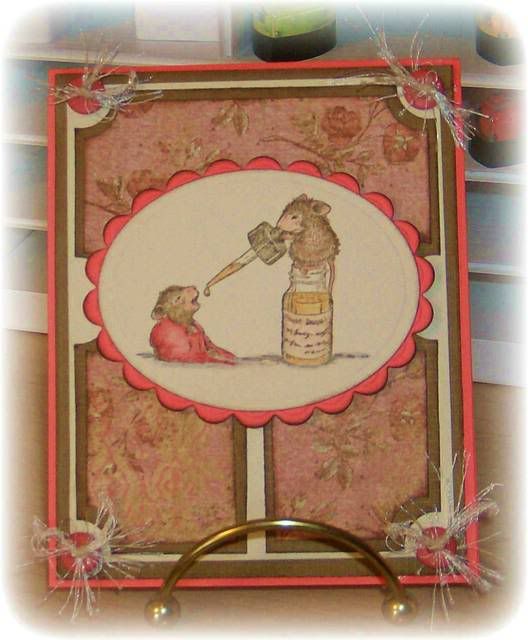
Thanks A Bunch Card

I created this card as a thank you for a women at work that was such a help during a very busy time.

I love fall colors and this paper really caught my eye.

FYI:

The paper is Heidi Grace, Shimmer Glitter Harvest Row


Border Punch is Martha Stewart Floral Lace


Flowers cut from WIMG at 1" (Paper pieced each one and used pop dots to raise 2 of them)


Thanks a bunch cut from WIMG at 1"

Nestabilities were used to cut out the oval from front of card and also for the background for flowers.

I added a few tiny rhinestones to several of the flower center on the front of the card.


Sunday, August 17, 2008

Pretty Hat Card

I picked up this stamp at a garage sale and just had to try it out.

Here is a card I created for my Secret Sister.

I stamped the image onto ivory smooth cardstock using SU Basic Black.

The hat was colored with Prismacolor pencils and smoothed out with mineral spirits.

Diamond stickles was added to the white "feathers" to give them some bling.

The center of each flower was dotted with Starry Night stickles. I also added Crystal stickles accents on the background paper.

I needed to tone down the white brad in the center of the large flowers so I covered the brad with Diamond stickles. (I was on a "stickles kick" I guess!)

To create the background around the image I took a small piece of plastic wrap and bunched it into a ball. Then I tapped it onto a Versa Color Sand Beige ink pad and tapped it onto the cardstock. You just repeat the process, ink up the plastic wrap, tap it onto the cardstock until you have as much color as you like. Using the same process I added a few hits of gold pigment ink to fill in some of the extra space.

The ivory cardstock edges were stamped with black ink and the edges of the lilac cardstock were also stamped with black ink.

The background paper was matted with black cardstock and I finished the card by machine stitching the background paper to the black mat.

FYI: The card is 6 1/2" x 5"

The background paper is Heidi Grace Designs "Cherrywood Lane Paisley"

The Stamp is PSX "Hat Stand"


Sprinkled With Fun - Uses Fun Flock

I wanted to try using fun flock. This is a simple birthday card that uses fun flock for the "icing" on the cupcake.

Stamp the cupcake image twice onto white smooth cardstock.
I used black pigment ink and on one of the images I heat embossed it with clear ep.

Cut out the icing from the unembossed image and run it through a Xyron UPSIDE DOWN. This give you the adheasive on the front side. Sprinkle the flock onto the adheasive and use your finger to gently press down on the flock. Tap off any excess flock.

Before I assembled the two images I used nestabilities to cut out the embossed image in an oval. I used a pink embossing pen to color in the cupcake's paper bottom and heat embossed with clear ep.

Now you can adhear the "icing" to the top of the embossed image.

To create the "sprinkles" I used tiny pink rhinestones and waterfall blue stickles.

The cherry is another stamp from this set that I stamped onto white smooth cardstock and colored in with a red Sakura Gelly Roll glitter pen. I cut out the cherry and used a pop dot to stick it to the top of the cupcake.

FYI: Stamps are Hero Arts Cleardesign "Cupcakes" Set
The Pink plaid paper is from DCWV Blossoms & Butterflys
The floral paper is from DCWV Floral Prints Mat Stack
The card is 5" x 6 1/2"