Showing posts with label Clear Cards. Show all posts

Sunday, April 5, 2009

Tinkerbell Easter Card

One of the ladies at work has a daughter that really loves Tinkerbell. I hadn't tried using my Tink cart yet but decided to give it a try. The tiny pieces are a challenge but I'm very please with how she turned out.

Photobucket

The egg was cut at 2 1/2" (real size) from Doodle charms. I stamped and embossed all the flowers and the bunny. The bunny was stamped with Versmark and clear embossing powder then while the powder was still hot I sprinkled golden sand powder over the top and heat it again. It give the bunny fur a cute look.

Tinkerbell's wings were cut using a silver shimmer paper (from HL) and glitter was added to the detail lines.

This card was made using a clear acrylic sheet from Sheetload Shortcuts. They are great to work with and have just the right weight to support larger/heaver images.

Saturday, January 24, 2009

Frosted Acrylic Card - Beautiful Music

Photobucket

I picked up this stamp at HL's this past week. I thought it was so pretty. I've used it to create this Valentine card on frosted acrylic that I purchased from Sheetload of Cards.

This was a tricky image to color. First I stamped with black Stazon ink onto Stampin' Up Whisper White cardstock. Next I used Prismacolor pencils and outlined the heart in red. I scribbled pink in the center of the heart then used the MCPT to blend the 2 colors into each other. I highlighted the music lines with a burnt yellow pencil. The stamp's picture shows all the splatters of color and to recreate it I put a couple of drops of ink from my Stampin' Up Reinkers into separate wells of a paint palete. Then using a tiny paint brush I dipped it into the ink and tapped the brush to create the splatters. I did this using red, yellow, pink, and green. I also managed to splatter my work surface, my tee shirt, my hands and my wall! But it was worth it! LOL Lastly I inked the edges of the cardstock with yellow and red Colorbox ink.

I stamped the dotted swirls on the acrylic using Stazon Red ink. After I was sure it was dry I added small drops of red stickles to the dots. The music notes and tiny hearts were stamped using Stazon Black ink.

Here is the inside:

Photobucket

The verse was printed onto the cardstock using my computer.

Thursday, January 1, 2009

1st card for 2009!


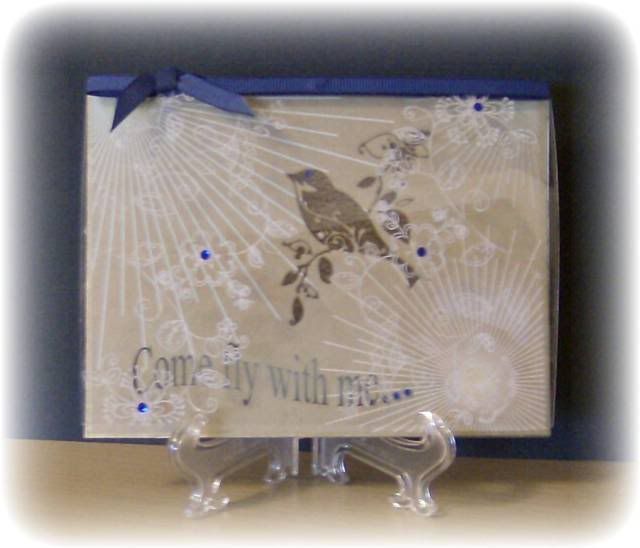
My first card of the new year! I created this clear card (which is a bugger to photograph) using clear acetate from Sheetloads. I cut an 8 1/2 x 11 sheet in half to give me a 4 1/4" x 5 1/2" card.

The flowers are stamped on the outside using Stazon White ink. The stamp is called Modesty by Penny Black. I stamped it once on the right then turned it and stamped again on the left.

The inside cardstock is from the Martha Stewart Golden Woodland paper pad. I used my computer to print the sentiment onto the cardstock before I cut it to size. The circles on the pattern were highlighted with a VersaMarker pen then heat embossed with Antique Gold embossing powder. (It doesn't show up well in the photo.) I edged the cardstock with an 18K gold leafing pen.

On the inside the bird stamp is from an Inkadinkado set called Birds Galore. I stamped the bird first with Stampin' Up's Chocolate Chip ink then again on top of the image with versamark and heat set clear embossing powder. This gave my bird a nice shine.

I added a blue rhinestone for the bird's eye and for the dots after the words. I also put a couple of rhinestones on the front of the card to highlight a few of the flowers.

The ribbon is Stampin' Up's Not Quite Navy.

Photobucket
I think this is a simple card with a big impact! What do you think?

Saturday, November 22, 2008

Clear Christmas Card


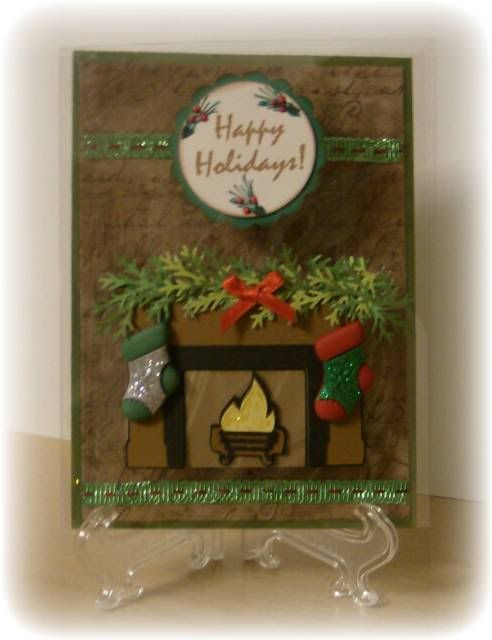
I used a lot of Cricut cuts on this card: George & Basic Shapes for the white circle, Mini Monograms for the scalloped circle and Joys of the Season for the fireplace and fire. The greenery on top of the fireplace was done with the Martha Stewart Leafy Branch punch. The stockings are buttons. The "Happy Holidays" was stamped using saddle brown Stazon ink. It has a goldish color to it. For the pine branches I colored my stamp with watercolor markers and then added dots of red Liquid Pearls.

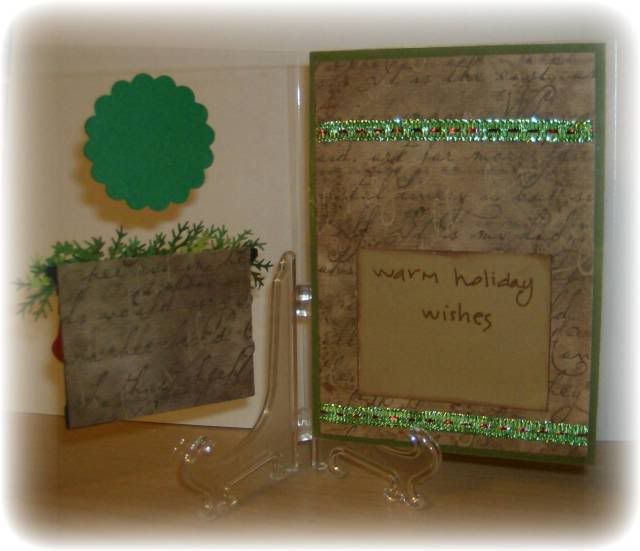
Here are a few tricks for creating a clear card. Design your card front but don't glue anything together yet. Then determine how you want the inside to look keeping in mind that it will show through. You always want to have a way to hide your adhesive. On the Happy Holidays circle I used glue dots to attach the white circle to the card front. Then glued the scalloped circle on the inside of the card front. See the picture below? After I glued the fireplace to the card front I cut a matching piece of paper that was the same size and used glue dots to adhere it to the inside of the card front to hide the back of the fireplace. I found the easiest way to make sure you position your pieces correctly on the inside of the card front is to hold them in place and use a small piece of painters tape. Just put a small piece so that you create a sort of hinge. You can then flip the piece over to put your glue dots on and flip it back into place. The painters tape comes off without tearing your paper or leaving any marks on the card.

To make the inside of the card I used my ATG to adhere the green cardstock to the back side of the card, keeping the tape 1/4" inside the edges. Then I glued the patterned paper to the inside of the card, centering it over the green cardstock. Now the adhesive from the patterned paper isn't visible when you look at the back of the card.

The "Warm holiday wishes" sentiment paper was cut the same size as the fireplace so when the card is closed you don't see it. Last I added the ribbon to the inside of the card . I hope this helps explain the process.

Friday, November 14, 2008

Clear Card - What a Challenge!


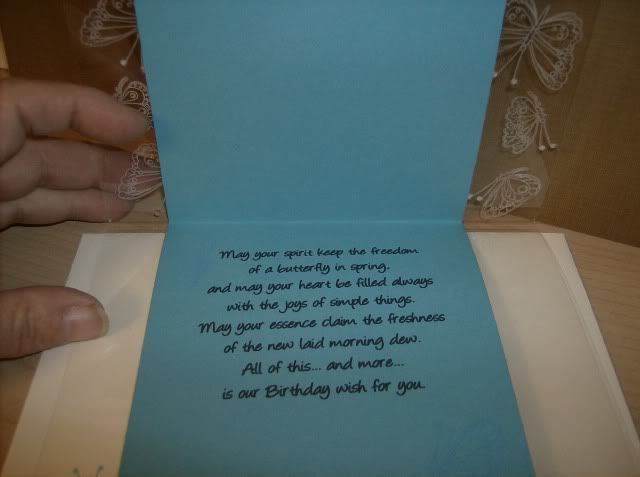
I wanted to try making a clear card. I have seen some beautiful cards made using the clear acetate blanks. This will challenge you for sure! There are tricks for hiding your adhesive. The first card I made ended up in the trash bin! I went back to the internet and spent several days reading all the tips and tricks I could find. This isn't the fanciest card around, but I love the stamped image and wanted it to be the highlight of the card.
The white butterflies were stamped using White Stazon ink. I originally started with Black Stazon and let me just say that stuff is slicker than ice when it comes to stamping on the acetate. What a challenge trying not to smear! After several attemps I gave up and switched to the white. It has a sticky property to it, similiar to VersaMark ink. This made stamping on the acetate very easy!
The image was stamped with Black Stazon ink onto Stampin' Up Whisper White cardstock. The coloring uses Prismacolor pencils and the MCPT. A dusting of stickles was added to the flowers and tiny rhinestones were placed on each butterfly.