Showing posts with label Doodlecharms. Show all posts

Sunday, April 5, 2009

Easter Basket Card

This card was made using my cricut and cuddlebug.

Photobucket

The label was cut from the Storybook cartridge. I put 18K gold paint on the edges. I used Mini Monograms to cut out the scalloped circle then ran it through the Cuddlebug using the Harringbone folder. All the eggs are from Doodlecharms. After they were cut I added stickles to parts of them, let that dry, than covered them with Glossy Accents.

The flower stems are from Walk In My Garden. They are actually the tulip border. I just put the eggs where the flowers would normally go. The basket is also from Doodlecharms. I pop dotted the basket and the label.

Tinkerbell Easter Card

One of the ladies at work has a daughter that really loves Tinkerbell. I hadn't tried using my Tink cart yet but decided to give it a try. The tiny pieces are a challenge but I'm very please with how she turned out.

Photobucket

The egg was cut at 2 1/2" (real size) from Doodle charms. I stamped and embossed all the flowers and the bunny. The bunny was stamped with Versmark and clear embossing powder then while the powder was still hot I sprinkled golden sand powder over the top and heat it again. It give the bunny fur a cute look.

Tinkerbell's wings were cut using a silver shimmer paper (from HL) and glitter was added to the detail lines.

This card was made using a clear acrylic sheet from Sheetload Shortcuts. They are great to work with and have just the right weight to support larger/heaver images.

Friday, January 23, 2009

Valentine Teacher Cards

I've been working on Valentine Cards for Teachers at the request of my co-workers.
This first one is very cute.....

Photobucket

I used the apple from Doodlecharms and in Design Studio placed a heart from George and Basic Shapes in the center of the apple so when it was cut out the apple had a heart shaped hole in it. I also cut out a separate heart that was just a tiny bit larger to place behind the opening. The picture doesn't show it but the white heart is flocked. The leaf is from Walk In My Garden. I outlined the leaf and stem with stickles. The stamp is from a Studio G set.

This next card is my favorite....

Photobucket

I had never made a suspension card before and this one took extra time to figure out the holes but the end result is very cool. The circle words were printed onto the designer paper using my computer and Microsoft Word. The black background is Black Magic cardstock with the blue core. I ran it through my Cuddlebug using the hearts embossing folder then gently sanded the raised portions to allow the blue to show through. The heart is glittered to add "pop" to the design. I think this would be a nice card for a male teacher.

Photobucket

Thursday, October 16, 2008

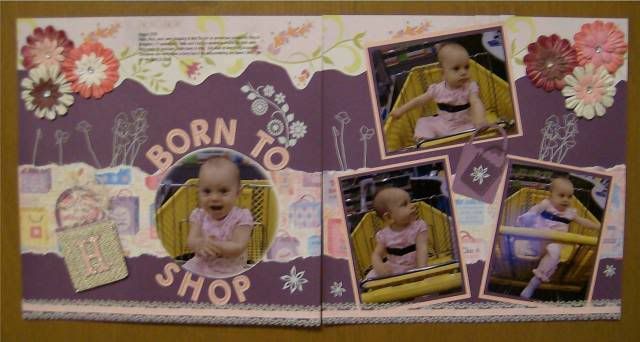
Born To Shop!


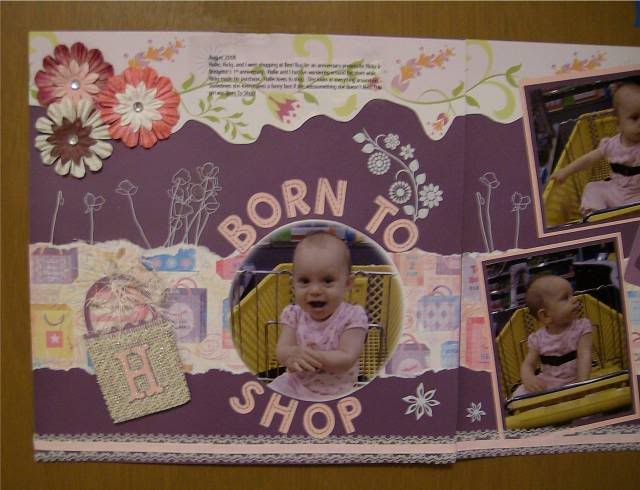
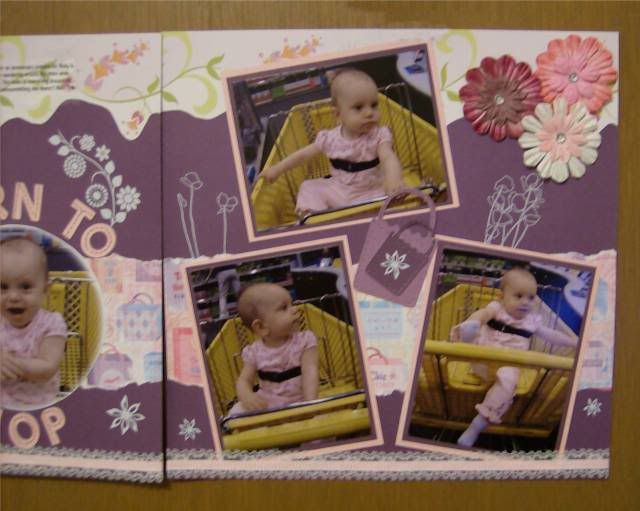
I went shopping with my son and 10 month old DGD. While my son shopped I wandered around the store with the baby. She loves to shop! She claps when she sees something she likes and makes a funny face when she doesn’t like something! This layout uses the Keystone, Doodlecharms, & Storybook Cricut cartridges.


“Born to shop” was cut with Keystone at 1”. I pierced holes and connected the holes with a silver glitter pen to create faux stitching.

The shopping bags are from Doodlecharms. The large bag was cut at 4”. I glued a piece of burlap over the front of the large bag and added the “H” (cut from Storybook at 1 ½” and glittered.) Fibers were tied to the bag handle for a little more texture. Tip: to keep the fibers from coming unknotted put a small drop of clear glue on the knot.

The large flowers are Bazzill Shimmers and the smaller flowers in the centers are paper flowers from Eyelets Etc. The white flowers are miniMARKS rubons. The shopping paper is by Karen Foster Design and Me & My Big Ideas makes the glossy floral cardstock. I cut off the floral border and saved the rest of the cardstock for another project.

Monday, September 29, 2008

Happy Owloween Card

This card was a learning experience using Design Studio. I created the card as one cutout in the gray cardstock, and cut out the layers separately. The background star paper should be on the inside of the card but my cardstock wasn't quite heavy enough to leave the "window" open. So I had to attach it to the back of the image. My cut file worked great so I can recreate this card when I get heavier cardstock.

I used Design Studio plus 6 different cartridges. Animal Kingdom for the Owl, Doodlecharms for the Pumpkin and Spider, George for the Moon, Opposites Attract for the word Owloween, Pooh & Friends for the Tree Branch, and Walk In My Garden for the word Happy.

The owl was cut at 2". I flocked the spider and added wiggle eyes. The pumpkin face is a stamp from Peachy Keen stamps and yellow stickles were added to the eyes and mouth. The doodles on the edge of the card were made with orange glitter gel pen and black stickles for the dots. The tree branches are 2 separate cuts that are overlapped. I had some patterned paper that looks like wood which really turned out perfect for the branches.

I learned many things creating this cut file. I won't be so hesitant to really put Design Studio to use in the future.