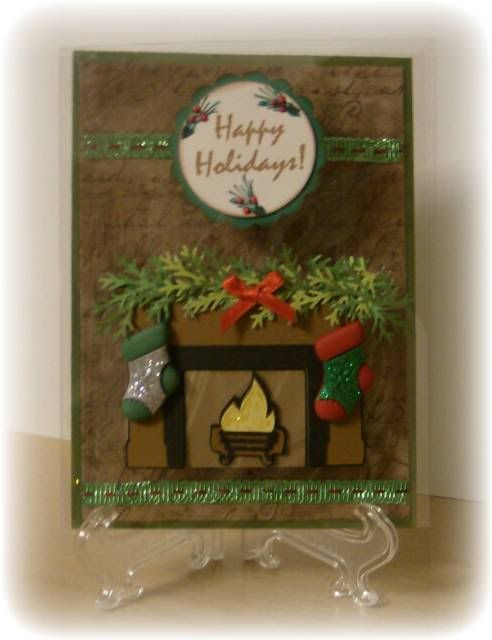
I used a lot of Cricut cuts on this card: George & Basic Shapes for the white circle, Mini Monograms for the scalloped circle and Joys of the Season for the fireplace and fire. The greenery on top of the fireplace was done with the Martha Stewart Leafy Branch punch. The stockings are buttons. The "Happy Holidays" was stamped using saddle brown Stazon ink. It has a goldish color to it. For the pine branches I colored my stamp with watercolor markers and then added dots of red Liquid Pearls.
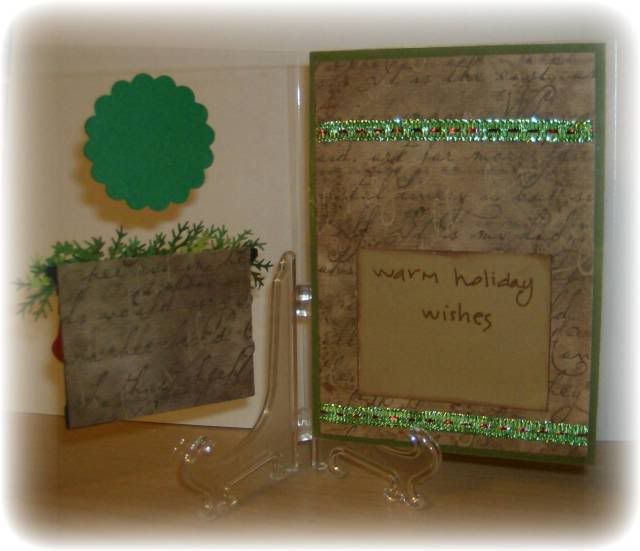
Here are a few tricks for creating a clear card. Design your card front but don't glue anything together yet. Then determine how you want the inside to look keeping in mind that it will show through. You always want to have a way to hide your adhesive. On the Happy Holidays circle I used glue dots to attach the white circle to the card front. Then glued the scalloped circle on the inside of the card front. See the picture below? After I glued the fireplace to the card front I cut a matching piece of paper that was the same size and used glue dots to adhere it to the inside of the card front to hide the back of the fireplace. I found the easiest way to make sure you position your pieces correctly on the inside of the card front is to hold them in place and use a small piece of painters tape. Just put a small piece so that you create a sort of hinge. You can then flip the piece over to put your glue dots on and flip it back into place. The painters tape comes off without tearing your paper or leaving any marks on the card.
To make the inside of the card I used my ATG to adhere the green cardstock to the back side of the card, keeping the tape 1/4" inside the edges. Then I glued the patterned paper to the inside of the card, centering it over the green cardstock. Now the adhesive from the patterned paper isn't visible when you look at the back of the card.
The "Warm holiday wishes" sentiment paper was cut the same size as the fireplace so when the card is closed you don't see it. Last I added the ribbon to the inside of the card . I hope this helps explain the process.

What a great card! Thanks for the info. on hiding the adhesive. All the little tips helps us become better card makers.
ReplyDelete~L~
Great job!.. I love it..
ReplyDeleteI love this card!!! Great job!
ReplyDeleteJolynda =)
Clear Christmas Card designed so gorgeously i appreciate your creative work...
ReplyDeletePlastic Business Cards
Plastic Business Cards
Plastic Business Cards